Hey there, curious soul! Ready to dive into the fascinating world of 3D photography? Whether you’re a tech buff or simply love capturing life’s moments in full dimensional glory, this article’s got you covered. Let’s explore how you can transform those flat photos into vivid, eye-popping scenes that convey depth like never before. So grab your camera, your adventurous spirit, and let’s embark on this exciting journey together!
Read Now : How To Take Linkedin Profile Photos
Getting Started with 3D Photography
Embarking on a beginners tutorial on 3D photography is like unlocking a new realm of creativity. Imagine looking at your photos and feeling like you could step right in! To start, you’ll need a dual-lens camera or a smartphone with 3D capabilities. These tools will help you capture images from slightly different angles, just like our eyes do, creating that sought-after depth effect.
Once your gear is ready, it’s time to play around with settings. Experiment with different subjects to see how lighting, angles, and distance affect your photos. For instance, capturing objects with contrasting colors can make them pop more prominently in 3D. Don’t be afraid to make mistakes; it’s all part of the learning process. With the right tools and a sprinkle of patience, you’ll be crafting stunning 3D images in no time.
Lastly, explore editing software dedicated to 3D photography. Post-processing can enhance the effects and bring out details you might have missed initially. There are several user-friendly apps available that cater to beginners. Dive in and let your creativity take flight, transforming ordinary scenes into extraordinary vistas with this beginners tutorial on 3D photography!
Essential Tips for Beginners
1. Choose the Right Equipment: Getting started with 3D photography doesn’t mean breaking the bank. A dual-lens smartphone can work wonders for beginners tutorial on 3D photography.
2. Play with Perspectives: Experiment with angles and distances. The right perspective can make a simple subject come alive in 3D photography for beginners.
3. Lighting is Key: Good lighting dramatically enhances your textures and depth in a beginners tutorial on 3D photography. Morning and late afternoon provide natural tones.
4. Edit Like a Pro: Use easy-to-learn editing software designed for beginners to refine your 3D photos, and unleash hidden details to elevate your shots.
5. Practice Patience: Perfecting 3D photography takes time and patience. So enjoy the process, and remember each shot is a step closer to mastering the craft.
Tools of the Trade
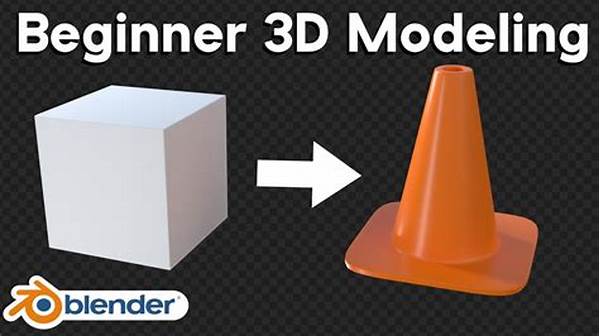
Now, before you feel overwhelmed, remember that a beginners tutorial on 3D photography doesn’t require state-of-the-art equipment to start with. If you have a smartphone with dual lenses, you’re already in the game! Not all magic happens at the shooting stage; sometimes, it’s all about how you edit your photos. Free software like Blender offers great features for creating 3D effects without eating into your budget. You’ll be amazed to see how much depth and life you can add to your pictures with just a little digital wizardry.
If you’re going all in, consider investing in a dedicated 3D camera. Tools like the Fujifilm FinePix or dedicated software like 3D Zephyr can enhance your craft immensely. But remember, it’s about the photos you take, not the gear you boast. Photography is ultimately about creativity and perspective. With these tools, your adventure into the wonders of beginners tutorial on 3D photography is bound to be exciting and fulfilling.
Exploring the Techniques
When diving into this beginners tutorial on 3D photography, understanding some core techniques can level up your skills:
1. Stereo Photography: Capturing two images from slightly different angles and combining them.
2. Anaglyph Technique: Uses red and cyan filters to produce 3D images for red/cyan glasses.
3. Cross-eyed Viewing: A way of seeing 3D without special equipment.
4. Wiggle 3D: Creates a 3D effect by quickly switching between two images.
Read Now : Experimenting With Color Harmony
5. 3D Printing: Converts 3D captures into tangible prints.
6. 3D Scanning: Uses a scanner to create digital 3D models.
7. Using Drones: Aerial 3D photography offers unique perspectives.
8. Macro 3D: Focus on tiny details for depth-rich imagery.
9. Lighting Differences: Accentuates shadows and depth.
10. HDR for 3D: Creates dynamic range in 3D shots.
Challenges and Solutions in 3D Photography
Overcoming Initial Hurdles
Like every journey, diving into a beginners tutorial on 3D photography might present a few bumps along the road. Adjusting to how 3D technology works can be daunting—but don’t let that scare you. Patience and practice are your best allies. Start with landscapes or still-life compositions where movement isn’t a factor, allowing you to focus on getting the depth just right without worrying about motion blur or alignment issues.
When something feels just a tad off, it might be the alignment or the perspective. Testing and tweaking are crucial, and each misstep is just a stepping stone towards mastering the craft. And always keep in mind: trial and error is a part of every expert’s journey. The more you work at it, the more natural it will become to view the world in 3D.
Growing Your Creative Palette
As you get comfortable, challenge yourself with more dynamic subjects. Ever tried capturing action shots or wildlife? Translating such motion-rich scenes into 3D can be tremendously rewarding. Don’t shy away from pushing creative boundaries; after all, that’s where innovation sparks. Combining diverse techniques from the beginners tutorial on 3D photography will pave the way for your personal style to emerge. Keep experimenting, and soon, your photo album will be filled with stunning 3D shots that leave everyone in awe!
Conclusion of Your 3D Journey
Congratulations on completing this beginners tutorial on 3D photography! You’re now well-equipped to explore the vivid and dynamic world of 3D imagery. As you continue to hone your skills, remember that each shot you take is a chance to capture a moment from your unique perspective. Whether you’re capturing monumental landscapes, intimate portraits, or experimental abstracts, the sky’s the limit.
Photography, especially 3D photography, is about seeing the world through a new lens. As you dive further into this realm, continue to embrace the process, learn from each photo, and celebrate your growth. There’s always something new to learn and ways to improve, making this journey continually rewarding. Keep snapping those breathtaking shots and enjoy every moment of this creative exploration!
Final Thoughts and Recap
3D photography opens the door to infinite possibilities, allowing us to relive moments with immersive depth and realness. As we wrap up this beginners tutorial on 3D photography, let’s review some of the highlights and insights gathered along the way. From understanding essential gear and techniques to troubleshooting common hurdles, you’ve been equipped with the foundational knowledge to explore this exciting medium.
Remember, the joy of photography lies not only in the final image but also in the journey of capturing it. So keep exploring, keep experimenting, and most importantly, keep sharing your vision with the world. Who knows? Your next photo could be the one to wow yourself and others. Embrace the limitless sphere of 3D photography and embark on adventures filled with depth and dimension—where every shot tells a story, every scene carries emotion, and the entire world is your canvas.