Hey there, fellow photo enthusiasts! If you’ve ever taken a picture and thought, “This could use a little magic,” you’re in the right place. We’re diving into the world of photo retouching with some beginner-friendly retouching instructions that won’t make your head spin. Let’s craft some stunning visuals together and explore the possibilities that even a novice can achieve with just a little bit of guidance and flair.
Read Now : “mobile Image Processing Techniques”
Getting Started with Beginner-Friendly Retouching Instructions
So, you’ve decided to dip your toes into the magical pool of photo retouching. First off, pat yourself on the back because you’re about to take your photography skill up a notch. The world of photo editing might seem like a digital jungle at first, but trust me, these beginner-friendly retouching instructions will make your journey smoother than a creamy avocado smoothie.
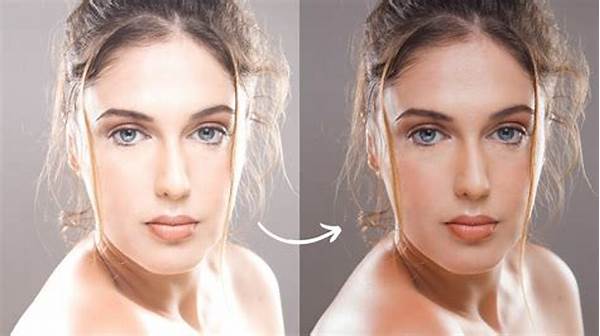
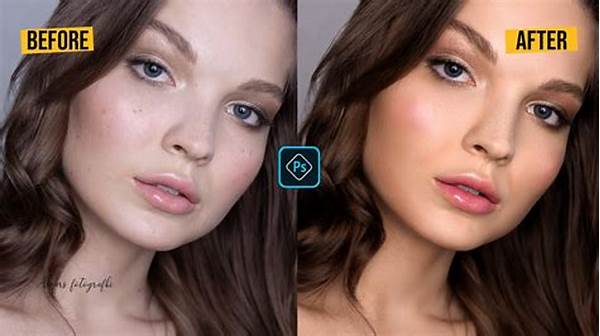
Let’s begin by talking about what retouching really means. Retouching is all about enhancing your photo to align with the vision you have in your head—whether that’s cleaning up blemishes, brightening up an image, or bringing out the vibrant colors that sometimes get lost in the picture-taking process. With these beginner-friendly instructions, you’ll learn to subtly tweak your images and make them pop without going overboard.
Now, you don’t need a fancy camera or some high-end software to start; a keen eye and some patience will do just fine. Start with free tools like GIMP or even the editing features on your smartphone. Remember, practice is key! As you follow these beginner-friendly retouching instructions, take your time exploring various tools and features. Before you know it, your photo editing skills will grow, and you’ll be creating images that turn heads.
Quick Tips for Beginner-Friendly Retouching Instructions
1. Start Simple: Begin with basic adjustments—think brightness, contrast, and saturation! Simple tweaks can make a big difference.
2. Zoom In: To make precise edits, zoom into your photo. You’ll see details you didn’t even notice before.
3. Layers are Your BFF: Use layers to make non-destructive edits so you can always revert if needed.
4. Don’t Overdo It: Retouching is about enhancing, not altering completely! Keep the essence of your photo intact.
5. Consistency is Key: Apply similar edits to images in the same series for a consistent look and feel.
Tools You’ll Need for Beginner-Friendly Retouching Instructions
Alright, so let’s talk gear without breaking the bank! You don’t need the latest gadgets to get started with retouching. All you need is a computer or smartphone and some software. Tools like Canva or Snapseed offer a user-friendly interface that’s perfect for beginners. Their multiple filters and automatic enhancements are like having a magic wand at your fingertips.
Digging deeper, if you’re ready to level up, software like Adobe Lightroom and Photoshop provide more advanced features. While they may seem intimidating at first, these platforms offer a ton of tutorials that are made for beginners. Plus, with our beginner-friendly retouching instructions, you’ll be navigating them like a pro in no time! Just remember – every expert was once a beginner.
Read Now : Optimizing Digital Photo Storage
So whether you’re editing on the go using phone apps, or diving into more intricate details on your PC, remember, patience is key. Keep experimenting and learning. With time, those beginner-friendly retouching instructions will become second nature, paving the way for creative experiments and amazing shots.
Mastering Techniques with Beginner-Friendly Retouching Instructions
The Journey with Beginner-Friendly Retouching Instructions
Alright, storytime! When I first stumbled into the world of photo editing, I was overwhelmed. All those fancy terms—saturation, contrast, vignette—felt like another language. But with time and some amazing beginner-friendly retouching instructions, I found my groove. And guess what? You will too! It’s all about experimenting and finding what works for you.
Start by editing photos of nature, landscapes, or even your pet. These subjects are forgiving and perfect for honing your craft. With each edit, you’ll learn a new trick, like highlighting your golden retriever’s fur to make it glow in the sun, or balancing the colors of a summer sunset. These beginner-friendly retouching instructions will guide you gently through the process and encourage you to take bold steps as you grow more confident.
Acquiring these skills isn’t just about social media likes; it’s about capturing and reliving the emotion of a moment. Whether it’s that sly smile of a friend at a brunch or the breathtaking detail of a gigantic waterfall, you’ll learn to appreciate the role of editing in storytelling. And remember—every snap is a new chance to improve, so keep snapping and editing!
Mastering the Slang of Beginner-Friendly Retouching Instructions
Let’s get real for a moment. This whole photo editing thing? Kinda like learning to ride a bike. It’s all about balancing at first, falling a few times, and then—bam! You’re riding with no hands. The same goes for mastering beginner-friendly retouching instructions.
When you’re diving into apps like Lightroom or even using your phone’s editor, the vibe is all about chill vibes and experimenting. Don’t sweat the small stuff! Mess around with sliders to see what colors pop, play with the exposure to draw out that epic sunshine moment, and feel like Piccaso when you “undo” those happy little mistakes. It’s super low-key and all about discovering what makes your style lit.
Final Thoughts on Beginner-Friendly Retouching Instructions
In the end, photography is as much about editing as it is about capturing the shot. The two go hand-in-hand, creating a symbiotic relationship that transforms images from good to great. With these beginner-friendly retouching instructions, you’re equipped with the tools needed to start this transformational journey.
Remember, each photo has its own story to tell and these instructions are your guide, helping you reveal those hidden narratives. There’s no rush, and certainly no pressure—the key is to enjoy the process. Whether it’s applying subtle changes or dramatic effects, your journey in retouching is unique and special. Embrace the exploration, stay creative, and most importantly, have fun editing!