Hey there! So, you’ve got your camera, you’re all set to shoot those dreamy portraits, but wait—your photos aren’t turning out as clear as you’d hoped. Fear not! Adjusting ISO for portrait clarity might just be the key to unlocking those stunning shots. Let’s dive into the world of ISO settings and how they can enhance your portrait photography game.
Read Now : Free Secure Image Sharing Platforms
Understanding ISO in Portrait Photography
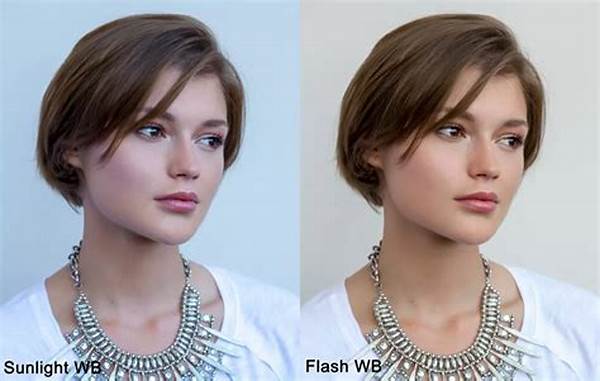
Alright, so let’s start with the basics. ISO is a setting on your camera that controls the sensitivity of the sensor to light. When you’re adjusting ISO for portrait clarity, a lower ISO (like 100 or 200) is typically ideal for bright, sunny days because it prevents your photos from being too grainy. But what happens when you’re shooting indoors or in low light? That’s right, you pump up that ISO to around 800 or even 1600 depending on the situation. The trick is finding that sweet spot where your portraits are sharp but not too noisy. Remember, always combine ISO settings with your aperture and shutter speed for the best results.
Quick Tips for Adjusting ISO for Portrait Clarity
1. Test Different Lighting Conditions: Adjusting ISO for portrait clarity requires practice. Try multiple ISO settings in various lighting to see what works best.
2. Combine with Aperture: Don’t forget to adjust your aperture. A lower ISO combined with a wide aperture can make your subject pop.
3. Mind the Noise: High ISO can introduce noise. Keep an eye on your photo’s graininess when adjusting ISO for portrait clarity.
4. Use a Tripod: If you’re using a low ISO in low light, a tripod can help avoid blurring.
5. Shoot in RAW: This allows for more flexibility in post-processing, especially when adjusting ISO for portrait clarity.
Mastering the Art of ISO for Portraits
Now that you’ve got the basics, let’s get practical. Adjusting ISO for portrait clarity isn’t about following strict rules; it’s all about creativity and experimenting. Grab your camera, head to different locations, and play around with settings. Whether it’s golden hour or a moody evening, the more you practice, the more you’ll understand the quirks of ISO adjustments. Don’t be afraid to bump up the ISO in darker situations where you need just that extra bit of light. Your portraits will thank you!
Common Mistakes When Adjusting ISO for Portrait Clarity
1. Ignoring Lighting Conditions: Always assess your environment before adjusting ISO for portrait clarity. Bright or dim, make sure you’re setting the correct ISO.
2. Forgetting to Decrease ISO: After shooting in low light, forgetting to lower your ISO can result in unnecessary noise in bright conditions.
3. Not Experimenting Enough: Don’t stick to one ISO setting. Explore various combinations to see what gets you that clarity jackpot.
4. Overlooking Post-Processing: Adjusting ISO for portrait clarity extends to editing. Tweaking photos in software can further enhance clarity.
5. Neglecting Your Camera’s Limits: Every camera handles high ISOs differently. Learn what your camera can comfortably manage.
Read Now : Appropriate Linkedin Picture Dimensions Guide
6. Relying Solely on ISO: Remember, ISO is just one part of the equation; balance it with shutter speed and aperture.
7. Assuming ISO is Set Correctly: Always double-check your settings before shooting to ensure adjusting iso for portrait clarity is effectively addressed.
8. Not Using Auto-ISO: For dynamic situations, auto-ISO is a helpful tool to swiftly react to lighting changes while keeping clarity intact.
9. Underestimating Tripod Use: A steady base can allow for lower ISO settings without compromising clarity during long exposures.
10. Disregarding the Subject’s Position: Sometimes, the best clarity comes from simply positioning your subject in optimal lighting rather than tweaking settings.
Adjusting ISO for Portrait Clarity: A Deeper Dive
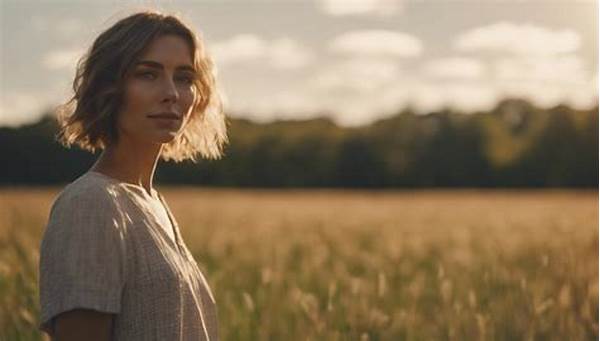
Alright, so we all know the gist of ISO, but when it comes to portraits, there’s so much more to explore. Adjusting ISO for portrait clarity is like painting—each setting brings out a different shade of your subject’s personality. Imagine capturing your friend’s eyes gleaming under a street lamp at night or their smile in soft daylight. The key is understanding how ISO intertwines with other elements. Pair a low ISO with a fast shutter speed for action shots or mix a high ISO with a low aperture for dimly lit intimate moments. It’s all about creating the perfect harmony.
And don’t let the numbers scare you. They’re your friends! Start with a medium ISO and work your way up or down, observing the differences each adjustment makes in clarity and texture. Adjusting ISO for portrait clarity might involve a bit of trial and error, but that’s the fun part. As you practice, you’ll begin to anticipate the settings needed for different scenarios, almost like second nature. So grab your camera, experiment away, and watch your portraiture skills soar!
Cracking the Code: Adjusting ISO for Portrait Clarity
Hey, photo peeps! So, ISO might sound all techy, but it’s basically just your camera saying, “Yo, how much light should I grab?” When it comes to getting that crisp, clear portrait, adjusting ISO for portrait clarity is ace! It’s like fine-tuning your radio to that perfect station with zero static. You want the details to pop without any grainy distractions, right? So, if you’re chilling in bright sunshine, keep that ISO low. But if you’re all about those cozy indoor vibes, let your ISO shine higher. Play around; it’s like cooking to taste—season to perfection!
Wrap Up: Mastering ISO for Perfect Portraits
So, you’ve journeyed through the ins and outs of adjusting ISO for portrait clarity. It’s clear now how this little setting helps shape those stunning photos you see on social media or in glossy magazines. By experimenting with ISO in relation to your environment, you unlock a new level of creativity and control. Remember, while a lower ISO can offer silky smooth finishes in bright conditions, higher ISO levels are your trusty allies in low-light scenarios. But don’t get too comfortable! Each photography session is an opportunity to learn something new about your camera’s capabilities.
Don’t overlook the importance of balancing ISO with aperture and shutter speed. They are a trio, working together to create photographic magic. So next time you’re composing a shot, take a moment to reflect on what you’ve learned about adjusting ISO for portrait clarity. With practice, patience, and an adventurous spirit, you’ll elevate your photography game and capture portraits that not only speak to you but also tell a story to everyone who views them. Happy shooting!