Hey there, fellow creatives and curious minds! Today, we’re diving into a world that transforms a simple snapshot into a mesmerizing piece of art. Welcome to the fantastic realm of photo editing! Whether you’re a total newbie staring wide-eyed at your first editing software or a seasoned pro looking to brush up on basics, this guide is for you. Grab a coffee, get comfy, and let’s explore how you can elevate your pictures from so-so to marvelous!
Read Now : Free Tools To Protect Photographs
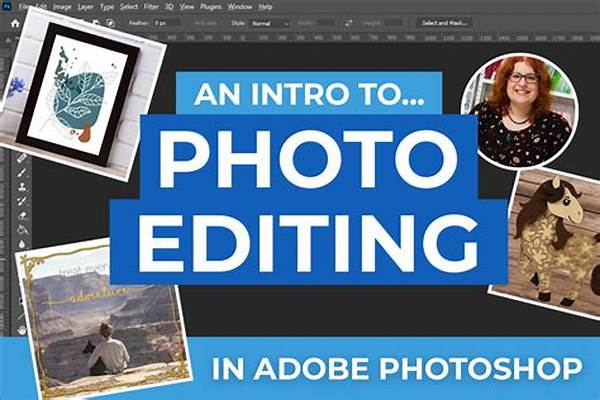
Getting Started with Photo Editing
Stepping into the world of photo editing can seem a bit like venturing into an artist’s workshop — full of potential but a tad overwhelming. So, think of this as your introduction to photo editing, where we’ll break things down into bite-sized pieces. Photo editing is the magic wand for photographers and creatives alike. It’s not just about correcting mistakes but also about showcasing your artistic vision. From adjusting exposure to enhancing colors or applying filters, the possibilities are endless!
In our introduction to photo editing, we’ll start with understanding the basics — the tools and resources you’ll need. Most people begin with software like Adobe Photoshop or Lightroom, but there are loads of other options out there depending on your needs and budget. The goal is to pick software you’re comfortable with as this will be your creative playground. Once you’ve selected your tool, you’ll learn the ropes — experimenting with features like cropping, brightness, contrast, and those beloved filters.
As you journey through your introduction to photo editing, remember that practice is your best friend. Don’t be afraid to play around with different effects and styles until you find your unique editing groove. The beauty of digital editing is that it’s all temporary — you can always undo or tweak till your heart’s content. So, go ahead and unleash your full creative potential!
Essential Tips for Beginners
1. Start Simple: In your introduction to photo editing, keep it basic. Focus on learning one tool at a time, like adjusting brightness or contrast.
2. Experiment With Filters: Filters can make a huge difference and are a fun way to see immediate results. Just remember, sometimes less is more.
3. Use Layers: If you’re using software that supports layers, this feature will be a game-changer in your introduction to photo editing.
4. Learn Shortcuts: Trust me, keyboard shortcuts will save you a lot of time and energy.
5. Explore Tutorials: There’s a tutorial for just about anything you might need. Watching professionals can offer insights and tips that’ll enhance your skills.
Tools and Software for Photo Editing
As we continue our introduction to photo editing journey, one of the most important decisions you’ll make is choosing the right tools. A variety of software options is available, each with its own strengths and quirks. Photoshop is the industry standard — it offers robust features and a wide array of tools for everything from basic adjustments to intricate manipulations. Yet, it may be overwhelming (and pricey) for newcomers.
Lightroom is another fantastic choice if you’re focused on photo enhancement and management. It’s more user-friendly for those starting their introduction to photo editing and doesn’t require the deep dive into learning curves that Photoshop might demand. For those who want a budget-friendly option, free tools like GIMP and Canva are excellent alternatives offering a commendable range of editing features.
Diving into these tools makes the introduction to photo editing feel like an exciting exploration rather than a chore. Keep in mind, it’s about finding what works for you so give yourself permission to try different ones until you click with the right one. Every editor has their favorite, and over time, you’ll find yours.
Common Photo Editing Techniques
1. Cropping: Trimming the unnecessary edges of a photo can instantly enhance its look. It’s the first skill to pick up in your introduction to photo editing.
2. Brightness & Contrast Adjustments: Brightening up a photo or adjusting the contrast can make your images pop.
3. Color Correction: Tweaking the hue and saturation is key to making your shots look vibrant.
4. Spot Healing/Cloning: Knocking off pesky blemishes or an unwanted object in the background can make a big difference.
5. Sharpening: This technique helps in enhancing the details of your photo.
Read Now : Equipment For Wildlife Photography Success
6. Blurring: A light blur can give a dreamy effect or help focus attention on the main subject of your photo.
7. Vignetting: Gently darkening the edges of a picture can lend a professional and focused look.
8. Noise Reduction: Removing that pesky graininess in your nighttime pics is a must.
9. Resizing/Scaling: Don’t lose quality when changing your image’s size.
10. Black and White Conversion: Sometimes everything in color doesn’t have the same impact as a crisp black and white.
Advanced Editing for Enthusiasts
Welcome, adventurous editors, to the segment where we take our introduction to photo editing up a notch. Once you’ve mastered the basics, you might feel ready to dabble in advanced editing techniques to truly bring your vision to life. Think of this as your green light to explore the realm of fine-tuning and creativity without limits.
Delving into advanced techniques, you might find yourself experimenting with custom curves and levels, adjusting the finer details of contrast and shadow that can dramatically change the mood of your photo. Another technique worth exploring is digital blending, perfect for landscape photographers looking to balance exposures across a scene. HDR (High Dynamic Range) processing is another exciting tool. It allows you to combine multiple pictures at different exposures for a dynamic, all-encompassing final photo.
Incorporating these advanced methods into your photo editor’s arsenal turns your introduction to photo editing into a deep dive into a vast ocean of creativity. The more you practice and learn, the more you’ll see your editing reflect exactly what you envision. Keep pushing boundaries and let the artistry continue to evolve!
Photo Editing Lingo: Breaking it Down
Yo, welcome to the jungle of photo editing lingo! It can seem kinda crazy, right? You got terms like “clipping” and “curves” being thrown around like confetti. But hey, don’t trip, we got you! In this part of your introduction to photo editing, we’ll break it down so you can talk the talk like a pro.
Ever heard about the “Golden Hour”? Photographers rave about it because it’s that magical time just after sunrise or before sunset when the lighting is oh-so-perfect. Then, there’s “clipping” — ain’t nobody got time for details being lost due to extreme bright or dark parts in a photo. And those “curves”? Nope, not Beyoncé-related, but a way to change highlights and shadows in your pics like a boss.
So in this intro to photo editing lingo, embrace the chaos and soak it all in. Before you know it, you’ll be out there, dropping terms like a seasoned editor. So don’t be shy, keep editing and exploring, because you got this!
Concluding Thoughts on Photo Editing
And there we have it, folks! Your introduction to photo editing doesn’t just end here; this is merely the launchpad. You’re now equipped with essential knowledge to venture deeper. Remember, good editing is about enhancing the story your photo is trying to tell. You’ve explored the basics, dipped your toes into advanced techniques, and even gotten a hang of the jargon — not too shabby!
As you work on more projects, each photo becomes a canvas for experimentation and storytelling. Whether it’s playing with new tools or combining tricks you’ve learned, let your creativity flow. Every edit you make sharpens your skills, transforms your perspective, and enhances your growth as a photo editor.
Stay curious and open-minded in your editing journey. The tools and techniques will keep evolving, but your passion for capturing moments in the best light will always serve as your compass. Here’s to constantly learning and growing through every shot you take and edit. Happy editing, and may every photo be a masterpiece in the making!